Wednesday, December 9, 2009

Tuesday, December 8, 2009

The lakes around here are frozen over. It happened just a few days ago. We're expecting eight inches of snow tonight. Time to take out the skates and cross country skis.

In the meantime I'll post more on my other canoe waka and ama projects. I will also keep a photo log of building a long, insulated epoxy curing box along one wall in my garage. I hope to heat the interior to 30 or 40 C.

It's time to put together sailing rigs. I plan to start with a relatively small, Oceanic Lateen shunting rig, no more than 100 square feet, something light weight and easy to learn on.

I plan to cut the sails out of heavy duty poly tarp and then engage a local small business that sews tarpaulins and awnings to hem the edges.

I'm also pretty keen about wing sails and have printed out a dozen or so U.S. patent documents on them.

Tuesday, December 1, 2009

LAUNCH DAY FOR MY OUTRIGGER CANOE (PROA)


(click on images to enlarge)


I finally launched my first proa at the south end of Cannon Lake.


GLORY TIMES!


The two wheeled dolly, shown above, worked perfectly, even through soft beach sand. The wae ends fit into forks in the top of the dolly cradle.

I used the same bungees to lash him together that I used to secure him on my roof rack, seen in the background. (Proas are male)

The bungee cord lashings are FAST, EASY, SECURE and CONVENIENT.

Everything worked according to my clear and definite vision. Cheers to Napoleon Hill!

The water was crystal clear and cold. There was no one else on the lake. Storm clouds were blowing in from the North. It was near freezing, and getting dark.

I elected not to perform a capsize drill.


He was a beautiful sight to behold .

He tracked nicely, owing to his deep vee hull, and was very stable.

The wedge shaped wae extensions worked beautifully, providing eye screw anchors for the bungee lashings, and elevating the akas above the water line.


LOOK AT HIM!


He goes fast with very little drag or resistance.

I can sit anywhere along the outrigger bench without submerging the bows, yet I can see how I can steer him by shifting my weight fore and aft.

I can lie down comfortably on the waka, between the akas.

The fore and aft outrigger spars interfered with paddling, but I can leave them off or move them out of the way.

The the ama lashing system developed by Gary Dierking worked BRILLIANTLY with the mooring cleats I mounted on the akas, shown above. In this case, I used 3/16 inch polyester cord, not bungees.

I was able to sail along at a fair clip with just the wind resistance of my body.

I could used multiple corners on the outrigger grid for fulcrums, for sculling along with my double bladed paddle.

HE IS GOING TO BE FAST WITH A WING SAIL OR TWO.


and now some preview images of my waka building saga . . .


Thursday, November 12, 2009

Finished Ama

The ama (outrigger float) all faired and sanded, resting on styrofoam cradles. It's ready for surgery to implant the hardwood posts, to connect the ama to the iakos (crossbeams).


Performing surgery with an underused Dremel Tool. Here I'm cutting through two layers: one layer of epoxy filled fiber glass tape over a single layer of epoxy filled 7 oz. e-glass cloth. I'm cutting a rectangle to closely fit the post.


Popping out the rectangular section of ama shell with a 1/4" chisel. It popped out cleanly and easily.

Surgical tools used to gouge out the styrofoam core.


Surgery complete. Socket ready for one of the hardwood (white oak) posts.


Test fit. Such a joy.


Posts bonded in place and ama painted with primer.


Dowel end of an ioko. The plywood cheeks at the end of the main beam should keep joint from spitting under load.

First test assembly.


Monday, November 2, 2009

Cannon Lake -- The Likely Launch Site


Last week I bonded the aka attachment posts into the Ama. Photos shortly. Meantime, here's Cannon Lake, Minnesota, the likely launch site. There's a nice sandy beach at the far (South) end of the lake.

Wednesday, October 28, 2009

Tuesday, September 22, 2009

Refining the shape and glassing the ama or outrigger float

Here's a view of styrofoam/plywood sandwich trimmed/shaped down to close to its final cross section for the top view and side view:


Next I removed material from the hard chines, to ultimately get an elliptical cross section...

Here I'm getting closer to the ellipse, but there's a lot of fairling with a long sanding board left to go.


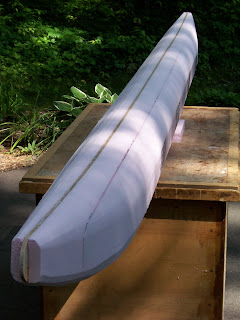
And voila!

Note: the styrofoam cradles, at least 4" thick, were extremely helpful at keeping the ama in place while I shaped it.


Friday, September 18, 2009

Styrofoam ama for my 16' outrigger sailing canoe

Late in the summer I started building a styrofoam and fiber glass ama for an outrigger canoe.

I followed Gary Dierking's advice posted here.

It's been fun and rewarding.

I learned a lot.

I definitely gained some skill at this amazing technique that's been used to build hundreds of thousands of surf boards.

This post shows the first steps of carving and shaping the styrofoam.

Check out Tim Anderson's interview (including videos) of a surfboard shaper on Maui --- top tips --- especially on power planer mods: Build a Surfboard Episode 1: Shaping

I designed the ama with my 2D CAD software, DeltaCAD ($39.95).

I highly recommend this drawing software if you're new to CAD. "The world's easiest CAD software."

I rough cut out the 12' foot long shear web from 5-ply, 1/4" Baltic birch underlayment from Menard's using an electric jig saw.

I shaved off the remaining 1/8" or so with a Stanley block plane to ensure the outline of the shear web was fair.

Sharpen your block plane on a water stone for daily Zen practice.
Then I bonded 2 layers of high density, 2" thick, extruded styrofoam to both sides of the shear web with marine epoxy thickened with microspheres.

I ordered the epoxy and microspheres from Glen-L Marine (Poxy-Shield and Microspheres filler).

I ripped the 2"x4'x8' sheets of pink styrofoam down to 10" wide strips on my table saw -- really a budget bench saw built into a extension table.

The first photo shows the resulting sandwich being rough cut (to within no less than 1/8" inch of the final shape). A Japanese pull saw, or one of the domestic versions (shown) works very well indeed, as Gary Dierking points out, and goes quite fast . . .


The second shows the power planer I used to obtain the final cross section. I duct-taped a Shop Vac hose to the planer's chip outlet. Note that Shop Vacs are NOT designed for continuous duty, so work for no more than 5 minutes at a time.

WARNING! CAUTION! AS WITH ALL POWER WOODWORKING TOOLS --- BE VERY CAREFUL OF THAT SPINNING BLADE!


After reading Tim Anderson's 'ible , I want to swap out my shaper blades with a spiral shaping barrel like the ones the surfboard shapers use:

But they sell for $375 Australian dollars !?!?!

And they seem way overkill for shaping styrofoam. I wonder if there's an ultralight pneumatic tool out there that does the same thing?

And the final cross section:

Then I transferred the lines for the plan section:

. . . and used several tools to trim away the excess material: pull saw, power planer, sanding board, sanding block. . .


gold party